Hey what's up everyone in this tutorial I'm going to show you how to build a wordpress website using Bluehost so this is a complete step-by-step tutorial if you're a beginner and you've never built a website this article is for you.


Sign up on Bluehost

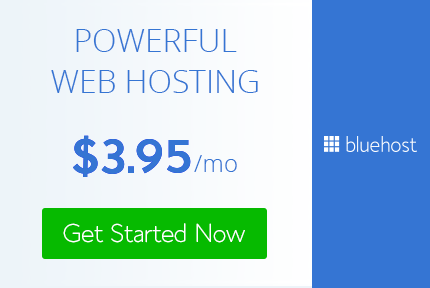
so the first thing you'll need to do is you'll need to sign up for Bluehost you can do this by clicking the first link in below that'll take you right to this website and you'll click get started now so you'll choose your plan for just 3 $ a month you can host one website or for 595 a month you can host unlimited websites so once you select your
plan. Purchase bluehost hosting from the banner or image given below to get discount and get a free domain.
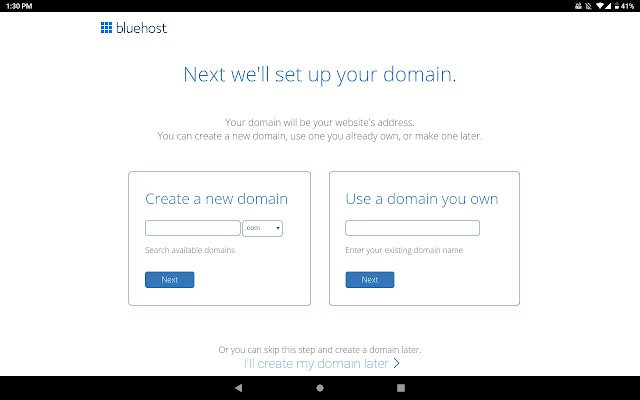
Choose domain name

choose your domain your domain is the URL of your website so for instance Google's domain is google.com now the great thing about Bluehost is you get this domain a hundred percent free so just by signing up and using Bluehost as your hosting company you'll get a domain a hundred percent free so type in the domain you're looking for click Next then you'll put in all your information in here and click Submit so once you've created a Bluehost account you should be inside the Bluehost dashboard now it's easy to get lost in all these buttons here.
Creating a WordPress website

we're creating a WordPress website we actually don't have to mess with any of this stuff we just have to go down here to website and find install WordPress and click on that ok .
How to choose domain name for wordpress

So now we're going to choose the domain that we're going to install WordPress to now if you've just created your account you should only have one domain but after you select your domain click Next so now we're going to add the admin information for your WordPress site the first one you'll do is the site name or title then you'll choose the email address that you want associated with your account your admin username and password now the user name and password will be used to login to your WordPress site once you're done with all of that go ahead and click next notice at the top it says WordPress is installing once it says installation complete click view your credentials here so at this point you should see your username and password displayed as well as the domain you just installed WordPress to go ahead and click on the domain that should take you to your WordPress login go ahead and enter the username and password you just created and click login so now you officially have a wordpress website and if you're logged in you should see this screen so now I'm going to show you how you can customize WordPress sites.
Costumize WordPress website

I'm going to show you how to create pages how to create blog posts and just a few of the basics to get you started so the first thing you'll want to know is how to see your website.
how to see your website
you do that by clicking in the top left corner here clicking on the site title so this is the website I have so far now I haven't actually done Something the reason there is already content here is because this content is part of the subject so the topic is what essentially controls the layout aspects of your website so if we click on the site title again it should take us back to the dashboard and we're going to talk about themes for a second.
How to change your theme
you can change your theme by going to appearance and then themes so as you're can see I currently have the theme installed if you want to change it to one of the themes on here just simply click activate now if you want to find other free themes go to wordpress.org themes right here and you can search through hundreds or maybe even thousands of free themes I'm not sure how many there are but there are a ton so once you find one that you like click install and then click activate so now if we go back to our website we'll notice that it is a completely different design and that's because we change the theme so before I talk about adding blog posts and pages and menus and things like that let's get familiar with the
customize panel.
Also read : How Social Media Can Impact Your SEO In 2020 | Information about SEO
customize panel.
Also read : How Social Media Can Impact Your SEO In 2020 | Information about SEO
How to Costumize panel
you click on customize right here or if you are back in your dashboard you can find customize by going to appearance and customize that way so the first tab here tells us which theme we have installed and allows us to change it right here in the customize panel the next tab is the site identity if you click on that that will give you the site title and a tagline so notice my site title is nomadic household and the tagline underneath it says just another WordPress website so if we wanted to change that too here is a tagline we would just fill it in there and click Save and publish okay so now we'll hit the back button and go back to the customize menu and the next tab is colours.
How to change colours
if we click on colors we'll notice we can change the header text color which is this right here or the background color so let's try changing the header text color which is currently white I'll set it to red so there it is it changed that quickly all you have to do is click Save and publish and it's final and you can always go and hit clear and it will put it back to the default settings so if we look again at the colors there was background color if we change that it changes the white background there to red or blue or green or whatever we want and if we want to put it back to white we can simply click on default and click Save and publish so again let's go back and take a look at the next tab which is header image.
Header image
now you can take this site title out and put an image there such as a logo or something like that just by simply adding a header image in here and clicking Save the next tab is background image if we click on that and we were to upload an image it would replace this white background with a image background so that is the customized panel for the most part before we get any further in it I want to show you how to create custom pages and blog posts so let's exit out of the customize panel and go back into our dashboard we'll start by creating a blog post.
Creating a blog post
to do this you'll go to post right here and you'll click add new to create a new one or you can find posts you've already created right here so let's click add new and this is where you'll enter the title of your post I'm going to call mine my first blog post and you'll enter your text right here and if you want to add an image you'll do that by going to add media once you've created the blog post that you want you just click publish now notice that the link for this post is my website comm slash the date and then the name of the post and maybe you want to change it so that it's simply the name of the post right after your website that way you have very clean URLs for your post the way that you change this is you go to settings and go to permalinks notice that it's set on day and name that's why the date is showing up as well you just click on post name and Save Changes and now if we go back to our post and click on my first blog post here notice the date is taken out of the URL so now let's talk about pages we could go back to our dashboard but since we've already got the panel here we'll just click on pages.
Create pages for your website or blog

pages are created the same exact way click add new add the title of your page add the text media you'd like to add and click publish so if we go back to pages we'll notice there is the sample page and the page we just created so now that we have at least two pages let's talk about menu.
Also read : Best Practices For SEO | Information about SEO
Also read : Best Practices For SEO | Information about SEO
Costumize Menu
if we go back and look at our website this page has already been added to the menu but we can customize this we can take pages out add pages in and organize them exactly how we'd like you can do that by going to menu here or if you're back in the dashboard you go to appearance and find menu right there so the first thing you'll do is you'll name your menu and you'll click create menu so we have page one and sample page showing up on our website if we wanted to remove the sample page from showing up we can simply go to remove here and click Save now if you wanted to add a home page.
Add your home page
your home page isn't an actual page what you'll do is you'll go to custom link you'll add your URL choose the text that you want the menu to display I'll add home click Add to menu and we can drag that above page 1 and if we go to pages you can always add pages back in by checking them and clicking Add to menu so under the menu settings will check navigation menu under display location and click Save menu now we should have home page 1 and sample page so that's how you create a menu in your WordPress site.
Conclusion
okay so now we've started with Bluehost and we've created a wordpress website and I've showed you how to use the customize panel how to create blog post pages menus and basically the best way to get better at building websites is to start building them I hope it was helpful and if it was please let me know by giving it a share up with your friend and relatives and if it wasn't please let me know in the comments how I could be more helpful so thanks again and I hope I see you in another article.
Subscribe for more information. Purchase bluehost hosting from the banner or image given below to get discount and get a free domain.
Thank you for reading and I'll see you on the next article.
Also read : Top 5 Best Spray Bottles In 2020
Also read : Straightforward Forex Tricks You Can Use Today
Also read : How Social Media Can Impact Your SEO In 2020 | Information about SEO
Thanks to share this essential information thanks ...👍👍👍👍👍👍
ReplyDeleteYes it's really great
Delete